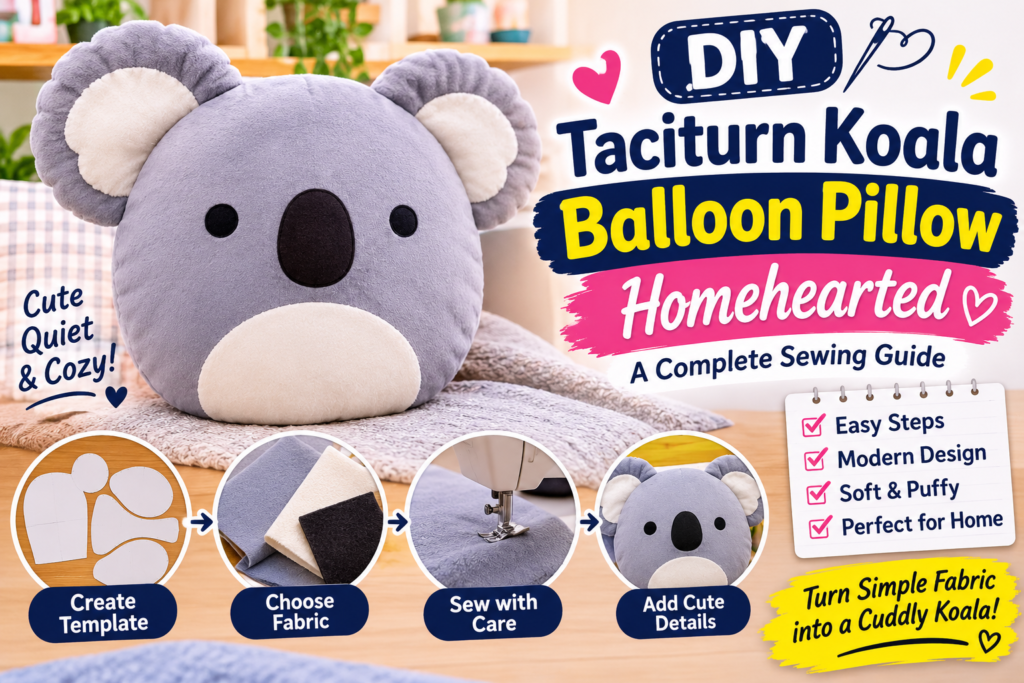
Most koala pillow tutorials give you a flat, floppy cushion with a face stitched on. This guide builds something different: a puffy, rounded, balloon-style koala with a calm, quiet expression and enough shape to sit upright on a bed or sofa. If you want a diy taciturn koala balloon pillow homehearted in style, meaning warm, handmade, and a little deadpan, this tutorial gives you the template logic, fabric choices, sewing order, and fixes for the problems that ruin most first attempts.
You don’t need advanced sewing skills. You need a sewing machine (or patience with a needle), basic fabric, stuffing, and about two to three hours.
What Makes This DIY Taciturn Koala Balloon Pillow Homehearted Project Different
Two ideas define this project, and it helps to separate them.
The balloon effect. A standard pillow is two flat panels sewn at the edge. A balloon-style pillow looks inflated: the shape is full, the edges are rounded, and the seam sits slightly inside the outline, so the stuffed body bulges past it. The trick is an extra row of stitching set a short distance inside the outer seam. It creates a raised outline, like the lip of a foil balloon.
The taciturn face. “Taciturn” means quiet and reserved. For a koala, that means a flat, calm expression: small eyes set wide apart, a large dark nose, and no smile. Cute-and-grinning koalas are everywhere. A serious one stands out and fits modern, neutral rooms better.
Quick Project Specs
| Detail | Estimate |
|---|---|
| Skill level | Beginner to confident beginner |
| Time | 2 to 3 hours |
| Finished size | About 16 inches wide, 15 inches tall (adjustable) |
| Approximate cost | $15 to $30, depending on fabric |
| Sewing machine required | Recommended, not mandatory |
| Washable | Yes, if you choose washable fabric and use polyester stuffing |
Costs vary by store and season, so check current prices before buying.
Materials and Tools
Here is everything you need, with where US crafters usually buy it.
| Item | Amount | Where to Buy |
|---|---|---|
| Main fabric (gray) | 1/2 yard | Joann, Michaels, Walmart, Amazon |
| Lighter fabric for ears, inner ears, belly patch | 1/4 yard | Same stores |
| Black or dark gray felt | 1 sheet | Michaels, Walmart, Hobby Lobby |
| Polyester fiberfill | 12 to 16 oz bag | Walmart, Amazon, Joann |
| Matching thread | 1 spool | Any fabric store |
| Black embroidery floss | 1 skein | Michaels, Walmart |
| Fabric glue or hot glue gun | 1 | Any craft store |
| Paper for template | 2 sheets of large paper | Newsprint, wrapping paper, or taped printer paper |
| Fabric marker or chalk | 1 | Any craft store |
| Pins or clips | A handful | Any craft store |
Optional: 9 to 12 mm safety eyes if the pillow is for an adult, a ruler, and a chopstick for pushing stuffing into corners.
Choosing Fabric for the Balloon Look
Fabric decides whether the pillow looks inflated or slumped. Here is how common choices behave.
| Fabric | Balloon Effect | Ease of Sewing | Notes |
|---|---|---|---|
| Satin or shiny polyester | Strongest, glossy and taut | Medium, can slip | Use fine pins and a new needle |
| Minky or plush | Soft and cuddly, rounder, less crisp | Medium, stretchy and sheds | Use clips, longer stitch length |
| Cotton or quilting cotton | Crisp but flatter | Easiest | Best for beginners |
| Faux fur | Fluffy, hides the seam lines | Hard, bulky | Cut with scissors one layer at a time |
| Felt | Firm, holds shape | Easy | No fraying, good for small versions |
If this is your first one, use cotton or a stable polyester blend. If you want the high-gloss balloon look, satin works, but sew slowly and test your stitch on a scrap first.
Stretchy fabrics like minky need a longer stitch (around 3 mm) and a walking foot if you have one.
Making the Template
You do not need a printable download. Draw the shape yourself.
Step 1: Draw the Head and Body Shape
- Fold a large sheet of paper in half and draw one half of a wide, rounded shape, about 8 inches from the fold to the widest point and about 15 inches tall.
- Make the top slightly wider than the bottom. Koala faces are broad.
- Cut along the line and unfold. You now have a symmetrical body.
Step 2: Draw the Ears
Koala ears are large, round, and fluffy. Draw a circle about 4 inches across. You need four of them: two outer ears in the main fabric and two inner ears in the lighter fabric, drawn at about 2.5 inches.
Step 3: Draw the Face Pieces
- Nose: an oval about 3 inches tall and 2 inches wide, cut from black felt
- Eyes: two small circles, about 3/4 inch, black felt, or safety eyes
- Belly or chest patch (optional): a lighter oval about 7 inches wide
Place the paper pieces on the body to check proportions. The nose should sit in the lower third of the face, and the eyes should sit above it, with a wide gap between them. That gap is what gives the quiet, unbothered look.
Size Adjustment Guide
| Finished Width | Scale Template By | Stuffing Needed |
|---|---|---|
| 12 inches | 75% | About 6 to 8 oz |
| 16 inches | 100% | About 12 to 16 oz |
| 20 inches | 125% | About 20 to 24 oz |
Stuffing amounts depend on how firm you want it, so buy one extra bag.
Sewing Instructions
The order matters. Doing the face first, while the fabric is still flat, makes everything easier.
Step 1: Cut the Fabric
Pin the template to your main fabric folded in half, right sides together. Cut two body panels (front and back). Cut four ear pieces: two in main fabric, two in lighter fabric if you are making lined ears. Add a 1/4 inch seam allowance around everything if your template has no allowance built in.
Step 2: Build the Face on the Front Panel
- Pin the nose in the lower center of the front panel.
- Use fabric glue to hold it in place, then stitch around the edge with a small zigzag or blanket stitch.
- Attach the eyes the same way. If using safety eyes, install them now and lock the backs behind the fabric. Do not use safety eyes on anything meant for a baby.
- Add a small vertical stitch line from the nose down for a mouth, using two strands of black floss. Keep it straight and short. A straight mouth reads as taciturn. A curved one reads as happy.
Step 3: Make the Ears
- Place an inner ear on each outer ear, right sides facing up, and stitch around the edge of the inner piece to attach it.
- Place a plain back ear piece on top, right sides together, and sew around the curve, leaving the straight bottom edge open.
- Turn right side out and press lightly.
- Do not stuff the ears. Flat ears tuck neatly into the seam.
Step 4: Place the Ears and Sew the Body
- Lay the front panel face up.
- Position the ears on the top curve, facing inward, about 3 inches apart. The raw ear edge should line up with the raw panel edge.
- Pin or clip them in place.
- Lay the back panel on top, right sides together.
- Sew around the whole outline with a 1/4 inch seam. Leave a 4 to 5 inch gap along the bottom for turning.
- Clip small notches into the curved seam allowance, without cutting through the stitching, so the curves lie smooth when turned.
Step 5: Turn and Stuff
Turn the body right side out through the gap. Push the ears and curved edges out with a blunt tool. Stuff in small handfuls, not big clumps. Start with the ears and top corners, then fill the head and work down. Pull the fiberfill apart before inserting it. Pre-fluffed stuffing avoids lumps.
Your diy taciturn koala balloon pillow homehearted should feel firm and plump, with no soft pockets when you squeeze the edges.
Step 6: Close the Opening
Fold the raw edges of the gap inward so they match the seam line. Close with a ladder stitch, which hides the thread, pulling every few stitches so the opening disappears.
The Balloon Effect Step
This is the step most tutorials skip.
After the pillow is stuffed and closed, sew a second line of stitching about 1/4 inch inside the outer seam, following the shape. This creates a narrow flat rim around the edge, while the middle stays full and domed.
| Setting | Recommendation |
|---|---|
| Distance from outer seam | 1/4 inch for 12-inch pillows, 3/8 inch for 16 to 20 inch pillows |
| Stitch length | 3 mm |
| Needle | New, medium size |
| Where to start | Opposite the closed gap |
| Speed | Slow, let the machine pull the fabric |
Compress the stuffing away from the stitching line with your free hand as you sew. If your machine cannot handle the thickness, hand sew with a running stitch using doubled thread.
For extra definition, add one or two curved quilting lines across the forehead and cheeks, the same idea as sewing a balloon into sections. This is optional but adds the segmented look you see in foil balloons.
Giving the Koala a Taciturn Expression
Expression comes from a few small decisions.
- Eye spacing: wide, about 3 to 4 inches apart on a 16 inch pillow
- Eye size: small, round, and plain, with no highlights or eyelashes
- Nose: large, dark, and slightly flattened at the top
- Mouth: a short straight stitch, or none at all
- Eyebrows: one small straight stitch above each eye, slightly angled down toward the nose, for a deadpan look
- Cheeks: none, skip blush or cheek patches
A koala with narrow eyes and a straight mouth looks calm. A koala with big eyes and curved lines looks sweet. Pick one before you start sewing and stay consistent.
No-Sew Version
If you do not own a sewing machine, you can still make a version of this pillow.
- Cut the body and ears from felt or fleece, since both resist fraying.
- Glue the face pieces on with fabric glue and let them dry fully.
- Apply a line of strong fabric glue or use a low-temp glue gun around the edge of the front panel.
- Press the back panel on, leaving a gap.
- Let the glue cure per the package directions before stuffing.
- Stuff gently so you do not stress the glue bond.
- Glue the gap shut and weigh it down for several hours.
No-sew pillows hold up fine as decor, but they are not ideal for hard play or frequent washing.
Troubleshooting Common Problems
Even a simple diy taciturn koala balloon pillow homehearted project goes wrong in predictable ways.
| Problem | Likely Cause | Fix |
|---|---|---|
| Puckered curved seams | No notches in the seam allowance | Clip notches into the curves before turning |
| Lumpy filling | Stuffing added in big clumps | Pull fiberfill apart and add small amounts |
| Flat top, droopy ears | Under-stuffed head | Push more stuffing into the top before closing |
| Face looks crooked | Features placed after assembly | Place all features on the flat panel before sewing |
| Visible gap stitching | Wrong closing technique | Use a ladder stitch and pull gently |
| Satin shifts while sewing | Slippery fabric | Use fine pins, tissue paper under the fabric, and a longer stitch |
| Seam splitting | Too much stuffing pressure | Reinforce with a second row of stitching |
| Balloon rim uneven | Stitching without compressing stuffing | Hold stuffing back with your free hand and sew slowly |
Safety and Care
Safety notes
- Do not use safety eyes or buttons for children under 3. Embroider or glue felt instead.
- Sew ears securely, since they are often pulled.
- Use new polyester stuffing from a sealed bag.
- Keep the pillow away from sleeping infants. Soft items in a crib are a suffocation risk, so treat this as decor or for older children.
Washing and care
- Spot clean when possible.
- If you must machine wash, use a gentle cycle in a mesh laundry bag.
- Air dry. High heat can warp fiberfill and melt satin.
- Felt and glued parts do not tolerate soaking.
Variations Worth Trying
Once you have made one diy taciturn koala balloon pillow homehearted, these adjustments take only minutes to plan.
- Mini keychain version: scale the template to 25% and stuff lightly.
- Giant floor pillow: scale to 150% and use an old pillow insert as a core.
- Nursery gift: embroider a name or birth date on the belly patch.
- Seasonal outfit: sew a tiny scarf or beanie.
- Pocket koala: add a patch pocket on the back for a phone or remote.
- Color swap: use cream, brown, or pale blue for a non-traditional koala.
Frequently Asked Questions
How long does it take to make a koala balloon pillow?
Most people finish in two to three hours. Add another hour if you are drawing your own template or using satin.
Is the DIY taciturn koala balloon pillow homehearted beginner friendly?
Yes. Use cotton or felt, keep the template simple, and skip the quilting lines on your first attempt.
What stuffing works best?
Polyester fiberfill is the easiest and most affordable choice. It is washable and widely sold in US craft stores.
Can I make it without a sewing machine?
Yes. Hand sew with a backstitch or use the no-sew felt method with fabric glue.
How do I get the balloon look?
Use a slightly glossy fabric, stuff firmly, and sew a second seam about 1/4 inch inside the edge.
What size should I make it?
Sixteen inches wide suits sofas and beds. Go to 12 inches for shelves or 20 inches for floor seating.
Can I wash it?
Yes, on a gentle cycle in a mesh bag, then air dry. Felt and glued versions should be spot cleaned only.
Final Thoughts
A good koala pillow comes down to three decisions: the shape of the template, the firmness of the stuffing, and the discipline to keep the face simple. The second seam and the straight-line mouth do more for the finished look than any expensive fabric. Follow the steps above, test your stitch on scraps, and you will end up with a diy taciturn koala balloon pillow homehearted style piece that looks deliberate, not like a first-timer’s experiment.